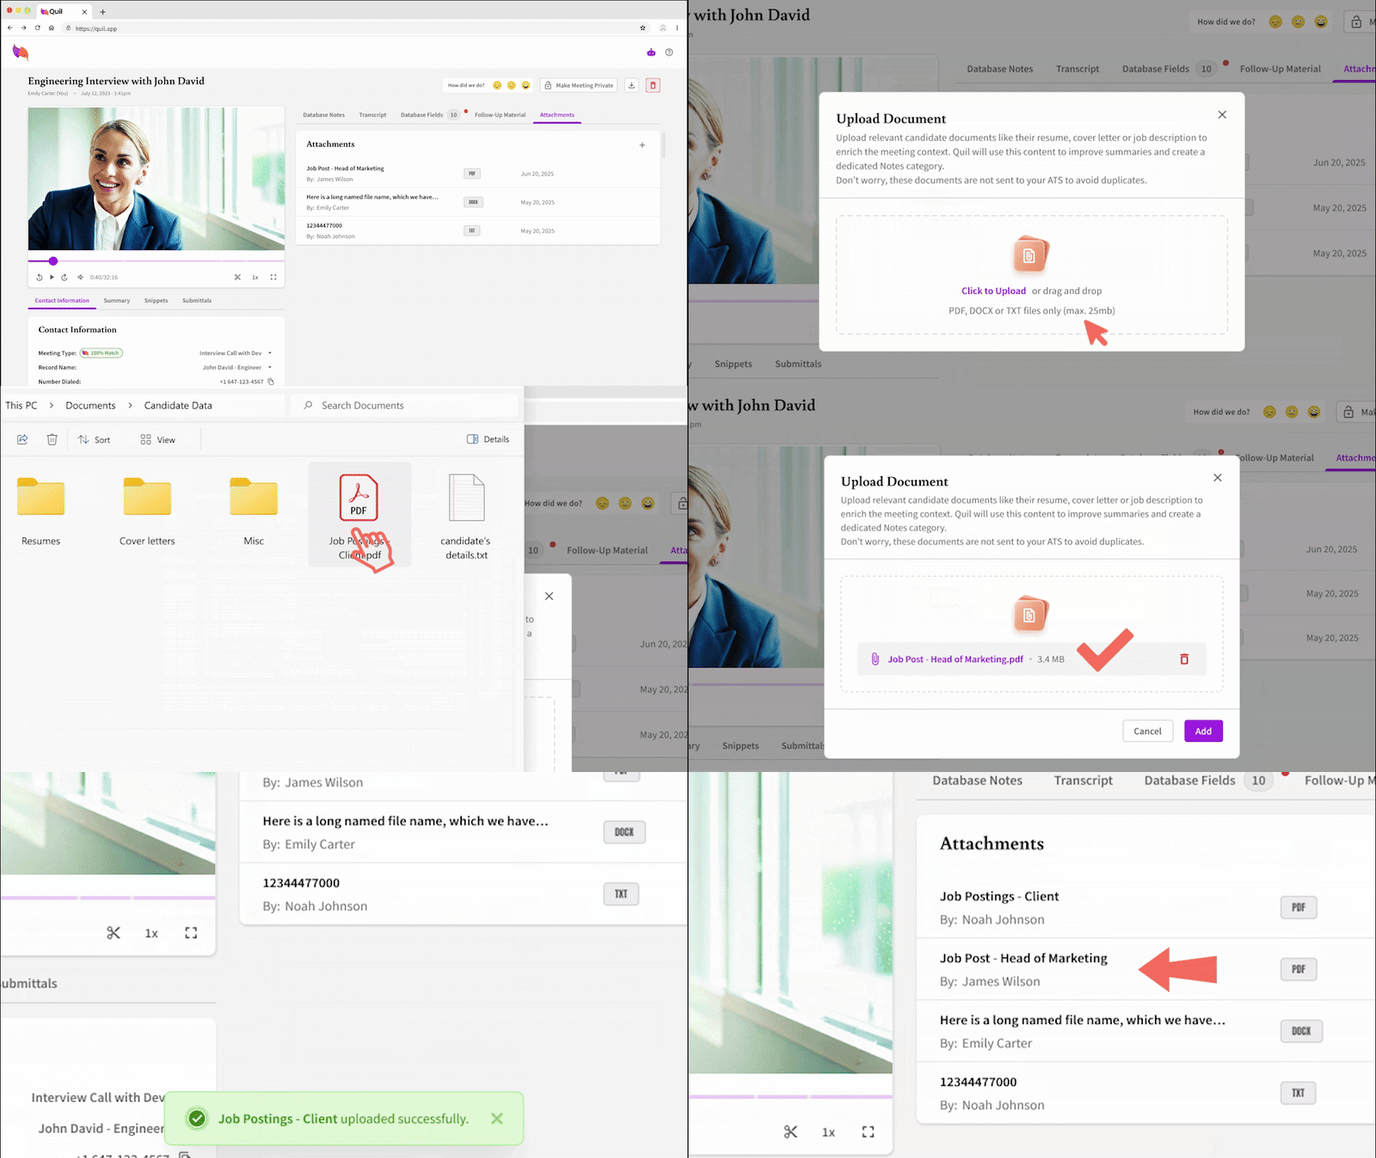
You can upload up to five attachments to any meeting, giving Quil more context and helping you generate richer follow-ups.
What attachments does Quil support?
Attachments can include resumes, cover letters, job descriptions, or any other relevant materials. Quil then uses the content to create more detailed follow-ups and summaries.
How do I upload attachments?
You can upload attachments to any meeting, either during the call or after it has finished.

To upload an attachment:
- Open the meeting in Quil.
- Go to the Attachments tab on the right side of your screen.
- Click the “+” icon and select the file you want to upload from your system.
How do attachments improve follow-ups?
Attachments give Quil more information to work with, allowing it to create follow-up materials that go beyond the meeting transcript.
Some common use cases include:
- Include details from both a candidate’s resume as well as the interview for a more thorough candidate submittal.
- Show a job description to be referenced alongside interview notes, showing how a candidate’s skills align with requirements.
- Upload a cover letter to provide additional context (especially relating to soft skills and culture fit) to a candidate’s profile.
If you upload documents after a meeting is completed, you can regenerate follow-up materials to include the new content.
Can anyone else see my attachments?
Your attachments follow the same privacy settings as the meeting to which they are uploaded.
For example:
- If a meeting is private, only you can see any attachments.
- If a meeting is shared with others, they will have access to all meeting content, including attachments.
- If someone does not have access to the meeting, they cannot see any part of it.
